Software
Software Installation
For the purposes of keeping everything consistent and not having to deal with hardware support on multiple operating systems, the IGVC 2026 robot will be ran purely on Linux for both development and deployment. There are a few different options for getting Linux on a machine that is running windows that we will run through below. If you've never used Linux before, please take a quick read through the First Steps in Linux wiki article. While it isn't in depth by any means, it should help you get through the basics.
Installation Options
As mentioned above, there are a few different ways to get Linux running on a Windows machine. We will list two below, but there are certainly more options (e.g. VirtualBox, VMWare, etc).
WSL (Windows Subsystem for Linux)
WSL, or the Windows Subsystem for Linux, is a piece of software developed by Windows that allows you to essentially run the Linux operating system within Windows (albiet without any graphics, although this is not a problem for us). The nice folks at Windows have already written a great guide for how to install this on your machine, including how to do download any prereqs, so head over to https://learn.microsoft.com/en-us/windows/wsl/install and follow the steps. NOTE: When you get to the "Install WSL command" step, you will want to specify a specific distro as listed below instead of using the default (we use Ubuntu 24.04). During setup it will ask for a password, just use something you'll remember it doesn't matter what.
wsl --install -d Ubuntu-24.04
Dual Booting
This will be written eventually as this installation needs careful instructions due to the nature of how to install it (creating a new partition on your drive, installing to it, etc). If you want to do this, there are some good articles and videos online that should help out!
Initial Steps
Now that you have Linux (Ubuntu 24.04) installed, we can get to the fun steps of actually installing all of the software needed to run the robot. If you haven't already, and are not familiar with Linux, take a quick read through the First Steps in Linux wiki article.
Cloning the Repo
Before we can do anything we need to clone the repository, found at https://github.com/soonerrobotics/igvc_software_2026. If you are unfamiliar with git, consider giving our What is Git wiki page a quick read! Most of the time, cloning the main branch is fine. If you haven't already, you should set up an SSH Key on your machine so that you can authenticate with Git and eventually push your code. GitHub already has a pretty good guide on how to do this, found at this link. Otherwise once you've done that, in your directory of choice (wherever you want the folder for the igvc software code to live), run the following command.
NOTE: Some versions of Ubuntu do not come with git preinstalled, if that is the case for you just run sudo apt install git (use your password from earlier if it asks for it) and it will install for you.
git clone git@github.com:SoonerRobotics/igvc_software_2026.git
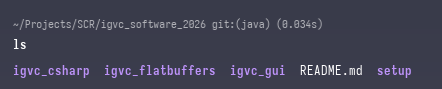
And then you can check if it all ran correctly, run the following commands and the folder structure should look similar to the image
cd igvc_software_2026
ls
Installing Dependencies
Installing and building the dependencies should be pretty simple, although it will take some time as we do build a few libraries from scratch (in particular, OpenCV and OpenCvSharp). You can just run the following set of commands to install everything, you may want to restart your terminal afterwards to make sure everything is sourced correctly but this likely isn't necessary.
cd setup
./install.sh
Once this finishes, everything should be installed! If you run into any issues with any of the above steps, please contact Dylan Zemlin and let him know so this guide can be updated. Once you are ready to start developing and running the code, head over to the Running the Code article to learn more about that.
Running the Code
Running the IGVC 2026 software is relatively straight forward. Before we start, please make sure you completely followed the Software Installation wiki page.
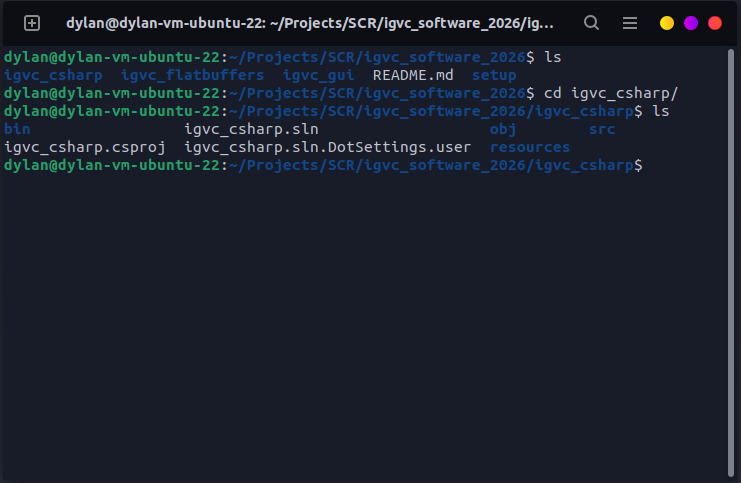
First, naviate to the igvc_csharp directory (your directory may not include bin or obj yet, those are artifacts from building the project).
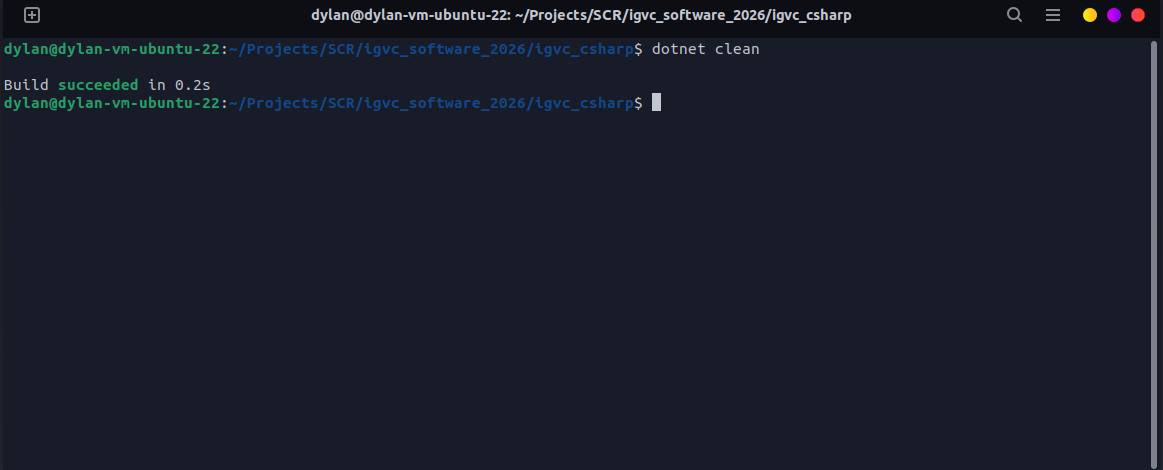
Next, run dotnet clean. This will clean up the project and create a fresh build, if there are any errors here try to resolve them. Any errors found that the standard setup guide does not resolve will be listed below.
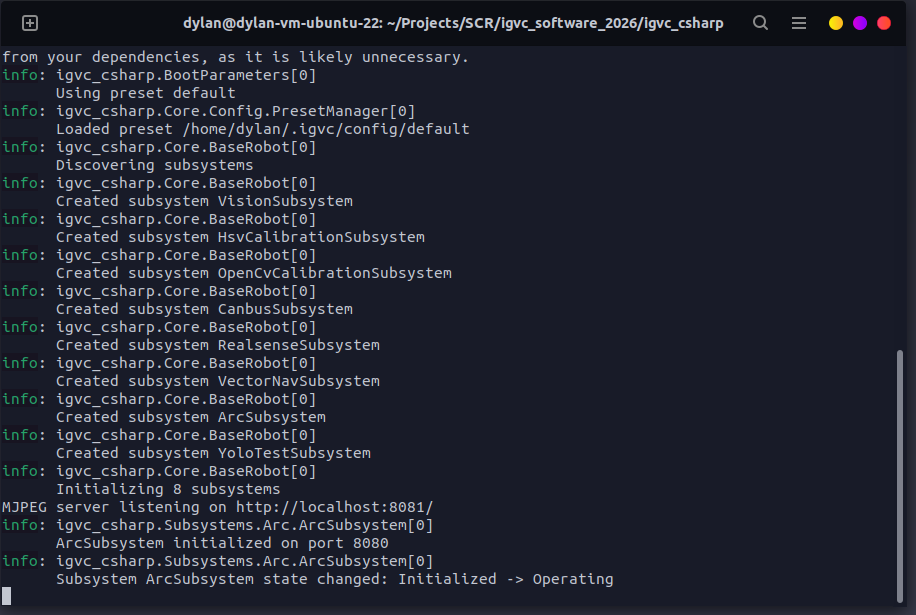
And finally, run dotnet run. You may get a few warnings, that's okay for now. You'll see something similar to the following.
You can change your configuration preset by running dotnet run -- --preset simulation but that doesn't currently exist yet. The future plan is for there to be a few premade presets. Before you start developing, take a look at the Software Overview page to get an idea of the system as a whole.
Software Overview
The IGVC 2026 software operates on a few different principles, namely
- Subsystems | Similar to FRC, Subsystems are a way to make separate but interconnected systems that perform different tasks. For example, we may have multiple different hardware subsystems that interact with different physical devices (e.g. camera, controller, canbus). Or, we may have a set of vision subsystems that handle tasks like hsv transformations, YOLO, depth mapping, etc. Each of these control how things are ran, whether shared tasks (essentially threads) are used, etc.
- Messages | The
Messagesfolder is a set of automatically generated code that we use to communicate between the simulator, the core, and the frontend. These generated classes allow us to ensure that the content of our messages will always be the same between languages.
There are more principles than this found in each sub project (the core, the simulator, the frontend), but the ones listed are shared between all of the projects.
The Core
The Core, something that can surely be named better, is the code that handles all of the real autonomy and hardware integration. It can be broken down into a few major parts, although these are still evolving as we work on this new codebase. All of this lives in the igvc_csharp folder.
Helpful C# Things
C# is likely going to be a new language to a lot of users, but it is fairly similar to Java syntax wise and has a ton of useful stuff we can use, and is very performant and is cross platform! Listed below are a bunch of links to things that may be confusing at first, but should become clear over time. I wouldn't just open them all up now and try to inhale all of the information, take it bit by bit as you use them when working on the codebase (or just go for it, whatever works best for you).
- Tasks
- Async/Await
- Attributes
- Keywords
Messages
Because the Messages system is used throughout the codebase, lets quickly go over that. The Messages are defined by flatbuffers (found in igvc_flatbuffers folder) and then compiled using the generate_local.sh script. Whenever these messages are sent over the network we use a special MessageWrapper class which just stores the data from the flatbuffer as a list of bytes and the type of message (e.g. ImageFrame, Metric, CommandReq/CommandAck, etc). Specifics for this can also be found in the Arc and Simulator documentation.
In order to actually construct these Messages, there is a helper class MessageConstructor which can build them for you. Converting them from their class forms to a MessageWrapper is a bit involved and is currently being worked on, ask Dylan for more information on that or look around the codebase for now.
Subsystems
As mentioned above, subsystems allow us to create a bunch of separate systems that can communicate with each other whilst remaining on separate threads. A barebones subsystem with a few overrides might look something like this
using igvc_csharp.Core;
namespace igvc_csharp.Subsystems.Hardware;

[Subsystem("RealsenseSubsystem", DependsOn = [], Disabled = false)]
public class RealsenseSubsystem : SubsystemBase
{
    public override Task Init(CancellationToken token)
    {
        return Task.CompletedTask;
    }

    public override Task Restart()
    {
        return Task.CompletedTask;
    }

    public override Task Shutdown()
    {
        return Task.CompletedTask;
    }
}
There are a few things to note. First, the class itself that you create (in this instance RealsenseSubsystem) must extend the SubsystemBase class in order to be created. Subsystems are automatically detected and initialied by a SubsystemManager class on program initialization. Second, you will notice a special attribute on the class, the Subsystem attribute. This defines a few helpers like the name for logging purposes, whether or not the subsystem is enabled (only checked on program initialization), and what other subsystems this one depends on. If your subsystem depends on another subsystem, and that subsystem was not created, it will not be created and a warning will be thrown.
Within the subsystem itself there are a few methods that you get access to.
- Init() - The
Initfunction is called whenever the robot itself is initialized and then initializes all subsystems in the order they were created (dependency order). A CancellationToken is passed for all task/threading purposes, you must use this cancellation token (or a child of it) whenever creating tasks so that everything shuts down properly. - Restart() - The
Restartfunction is called whenever a subsystem is required to restart. This is typically called from the frontend, and most of the time your implementation should just be calling shutdown and then calling init. It is safe to ignore this if desired. - Shutdown() - As the name implies, this is called whenever the subsystem needs to shutdown. Your CancellationToken provided in the Init() method will be cancelled before this method is called, so keep that in mind whenever you are freeing resources and doing similar tasks.
None of the above methods should be blocking method (such that they block the thread they are on). All subsystems share the same thread on the above methods, and thus any long running tasks should have their own tasks created. See other subsystems for examples of this.
A less commonly used feature, but still a very helpful one, is the ability to inject subsystems into your subsystem via dependency injection. An example of this is given below
[Subsystem("ControllerSubsystem", DependsOn = [typeof(CanbusSubsystem)])]
public class ControllerSubsystem (CanbusSubsystem canbus) : SubsystemBase
{
    async Task WriteControllerLoop(CancellationToken token)
    {
        // This function would be called elsewhere
        while (!token.IsCancellationRequested)
        {
            // Uses the injected CanbusSubsystem to call a method
            canbus.WriteFrame(xyz);
        }
    }
}
In this example, we are injecting the CanbusSubsytem (note that it is marked as a dependency for this subsystem) and then using it later on. It can be said that if a subsystem is marked as a dependency and its requested to be injected, it will not be null. However, if it is not marked as a dependency you can not maintain that same logic and thus you should consider it as nullable with the following syntax
[Subsystem("ControllerSubsystem")]
public class ControllerSubsystem (CanbusSubsystem? canbus) : SubsystemBase
{
    async Task WriteControllerLoop(CancellationToken token)
    {
        // This function would be called elsewhere
        while (!token.IsCancellationRequested)
        {
            // Uses the injected CanbusSubsystem to call a method
            // NOTE: We now use the ? operator to conditionally call WriteFrame if canbus is not null
            canbus?.WriteFrame(xyz);
        }
    }
}
Lastly, there is also the concept of the SubsystemState. TODO FILL IN
Events (EventBus)
Events are one of many ways to pass data around the program. This is useful for things you may want to use in multiple areas instead of directly calling another subsystem. All events are passed to the EventBus (think of like a bus electronically) and propagated to subscribers. The SubsystemBase class has a few useful helpers to subscribe to the EventBus. Note that subscriptions should be made in the Init() method of your subsystem. You do not need to do any unsubscribing yourself unless desired, it will happen automatically on shutdown.
All events sent to or are received from the EventBus must implement the IRobotEvent interface, the compiler will not let you send or receive messages if this is not the case. Due to how the lower level functionality of the event bus works, you must also use the record keyboard instead of class (learn more about what record is here). Using the sealed keyword is also recommended but not required, it just prevents other classes from inheriting from it. An example is found below.
public sealed record ConfigChangedEvent(
    string Path,
    object Value
) : IRobotEvent;
Before we go over how to subscribe to events, lets quickly cover publishing events. To do this, all you need to do is access the EventBus instance and then publish a instance of your event.
ConfigChangedEvent ev = new ConfigChangedEvent("test", "test");
EventBus.Instance.Publish(ev);
NOTE: Your class WILL receive your own events that you publish, so please be careful of recursive event loops.
Subscribe
The standard Subscribe<T> function allows you to subscribe to a specific message type with no additional filtering. This is useful if you know that you want all messages of a specific type.
    public override async Task Init(CancellationToken token)
    {
        // Subscribe to PerformanceSampleEvent
        Subscribe<PerformanceSampleEvent>(
            OnPerformanceSampleEvent,
            token
        );
    }

    private Task OnPerformanceSampleEvent(PerformanceSampleEvent e, CancellationToken token)
    {
        return Task.CompletedTask;
    }
SubscribeMessage
The SubscribeMessage<T> function allows you to subscribe to a shared Message (from the Messages folder). Due to semantics and how the compiler works, we cannot magically check for the underlying MessageType so you must also specify that. All this function does is wrap the above Subscribe<MessageWrapper> function and filter based on the type you provide and then cast to the provided data.
    public override async Task Init(CancellationToken token)
    {
        // Subscribe to ImageEvents
        SubscribeMessage<ImageFrame>(
            MessageType.ImageFrame,
            OnImageReceived,
            token
        );
    }

    private Task OnImageReceived(ImageFrame frame, CancellationToken token)
    {
        return Task.CompletedTask;
    }
SubscribeImage
Similar to SubscribeMessage, SubscribeImage will allow you to subscribe to a specific ImageFrame with a specific image identifier. This is useful if say you only want to subscribe to images that have been thresholded.
This function is just a wrapper for SubscribeMessage<ImageFrame> that adds an additional check for the image identifier.
    public override async Task Init(CancellationToken token)
    {
        // Subscribe to only hsv_view image identifiers
        SubscribeImage(
            "hsv_view",
            OnImageReceived,
            token
        );
    }

    private Task OnImageReceived(ImageFrame frame, CancellationToken token)
    {
        return Task.CompletedTask;
    }
Configuration
The configuration system is pretty barebones right now, but all of our configuration lives in the Constants.cs file. To specify a constant that cannot be modified by the frontend (or preset system), simply create a standard static or constant variable like many in that file. To create a configurable "constant", you will need to use the Config attribute. Three examples are given below.
// Configures a constant variable that cannot be modified by the frontend
public const int MaxConnections = 32;

// Configures a constant variable that can be modified by the frontend
[Config("simulator.port")]
public const int Port = 4001;

// Configures a constant variable that can be modified by the frontend, using a custom type.
[Config("vision.ground_threshold")]
public static readonly ColorUtils.ColorRange GroundThreshold = ColorUtils.ColorRange.From(
    ColorUtils.Color.FromHsv(0, 0, 0),
    ColorUtils.Color.FromHsv(180, 255, 255)
);
For custom types, you must provide a custom serialize/deserialize method. This is done by implementing the IConfigSerializable<T> interface. An example of the methods is given below.
public object Serialize() => new { min = Lower.Serialize(), max = Upper.Serialize() };
public object Deserialize(object value)
{
    var obj = (JsonElement)value;
    var lowerObj = obj.GetProperty("lower");
    var upperObj = obj.GetProperty("upper");
    Lower = Color.StaticDeserialize(lowerObj);
    Upper = Color.StaticDeserialize(upperObj);
    return this;
}
Arc
Arc, or the "Autonomous Robotics Controller" (I think is what it stood for) is the system that allows our frontend interface and the core robot code to communicate. As noted before, it communicates via the Messages system and similarly has generated classes for all involved languages (C#, Typescript). The ArcSubsystem handles listening to the EventBus to send messages to the frontend as well as listen for messages from the frontend and announce them in terms of Commands.
Commands
Commands are a way for the frontend to communicate to the core to perform some action. This may as simple as shutdown the robot, or as complicated as a calibration suite for the cameras. They have a command id and optional command data. I apparently got rid of this in the most recent version of the codebase so it currently does not exist, but it will soon look like the following. These methods with the Command attribute will automatically be discovered and called when a command is received.
// Listens for CommandId.RestartRobot
[Command(CommandId.RestartRobot)]
public Task OnRestartCommandTriggered(ArcCommand command, CancellationToken token)
{
  // Do stuff
  return Task.CompletedTask;
}
This will also support replying in a nice and easy way, but not sure how yet.
Metrics
Metrics are a way for us to track things like the utilization of the canbus, how often things are happening, etc. This system is going to get reworked to be a bit more clear on how it works. The idea is that you construct a metric like
// Emits the total bits received and written (so bus utilization) over the last second every 250ms
[Metric(
  "Total Bits Per Second",  // Display Name
  "bits",  // Unit
  Group = "Hardware", // Group
  Aggregate = MetricAggregate.Sum, // How do we process this data?
  EmitEveryMs = 250, // How often do we emit this data to the eventbus?
  MaxAgeSeconds = 1 // How long do we keep this data?
)]
private PerformanceMetric<double> _bits;

...

_bits.AddSample(bytesWritten * 8);
Chronos
Chronos is a replay system that lets us store all of the information the robot is recording while it is operating (such as camera feeds, gps, hardware data, metrics, etc) and then use custom software to view it later. While not created yet, this system will work similar to the Metric's system and have support for either automatically extracted variables at an interval or manually report data.