
Software Installation
For the purposes of keeping everything consistent and not having to deal with hardware support on multiple operating systems, the IGVC 2026 robot will be ran purely on Linux for both development and deployment. There are a few different options for getting Linux on a machine that is running windows that we will run through below. If you've never used Linux before, please take a quick read through the GettingFirst StartedSteps in Linux wiki article. While it isn't in depth by any means, it should help you get through the basics.
Installation Options
As mentioned above, there are a few different ways to get Linux running on a Windows machine. We will list two below, but there are certainly more options (e.g. VirtualBox, VMWare, etc).
WSL (Windows Subsystem for Linux)
WSL, or the Windows Subsystem for Linux, is a piece of software developed by Windows that allows you to essentially run the Linux operating system within Windows (albiet without any graphics, although this is not a problem for us). The nice folks at Windows have already written a great guide for how to install this on your machine, including how to do download any prereqs, so head over to https://learn.microsoft.com/en-us/windows/wsl/install and follow the steps. NOTE: When you get to the "Install WSL command" step, you will want to specify a specific distro as listed below instead of using the default (we use Ubuntu 24.04).
wsl --install -d Ubuntu-24.04
Dual Booting
This will be written eventually as this installation needs careful instructions due to the nature of how to install it (creating a new partition on your drive, installing to it, etc). If you want to do this, there are some good articles and videos online that should help out!
Initial Steps
Now that you have Linux (Ubuntu 24.04) installed, we can get to the fun steps of actually installing all of the software needed to run the robot. If you haven't already, and are not familiar with Linux, take a quick read through the GettingFirst StartedSteps in Linux wiki article.
Cloning the Repo
Before we can do anything we need to clone the repository, found at https://github.com/soonerrobotics/igvc_software_2026. Most of the time, cloning the main branch is fine. If you haven't already, you should set up an SSH Key on your machine so that you can authenticate with Git and eventually push your code. GitHub already has a pretty good guide on how to do this, found at this link. Otherwise once you've done that, in your directory of choice (wherever you want the folder for the igvc software code to live), run the following command.
NOTE: Some versions of Ubuntu do not come with git preinstalled, if that is the case for you just run sudo apt install git and it will install for you.
git clone [email protected]:SoonerRobotics/igvc_software_2026.git
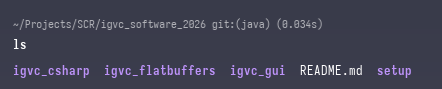
And then you can check if it all ran correctly, run the following commands and the folder structure should look similar to the image
cd igvc_software_2026
ls
Installing Dependencies
Installing and building the dependencies should be pretty simple, although it will take some time as we do build a few libraries from scratch (in particular, OpenCV and OpenCvSharp). You can just run the following set of commands to install everything, you may want to restart your terminal afterwards to make sure everything is sourced correctly but this likely isn't necessary.
cd setup
./install.sh
Once this finishes, everything should be installed! If you run into any issues with any of the above steps, please contact Dylan Zemlin and let him know so this guide can be updated. Once you are ready to start developing and running the code, head over to the Running the Code article to learn more about that.